If you’re running a Linux server on Evoxt VPS, setting up Fail2Ban SSH protection is one of the most effective ways to secure your server. Fail2Ban helps automatically block brute-force login attempts, reducing risk and improving security.
What is Fail2Ban?
Fail2Ban is a log-monitoring tool that detects suspicious activity, such as repeated failed login attempts, and automatically bans those IPs using firewall rules. It’s an essential layer of server protection for any
VPS, including those hosted on Evoxt.
Why Use Fail2Ban on Evoxt VPS?
- Defend against brute-force SSH attacks
- Automatically block malicious IP addresses
- Reduce server load from constant login attempts
- Strengthen Evoxt’s performance with extra security
Step 1. Update Your System
# Debian/Ubuntu
sudo apt update -y

# AlmaLinux/Rocky Linux/RHEL
sudo yum update -y
sudo yum install epel-release -y
Step 2. Install Fail2Ban
# Debian/Ubuntu
sudo apt install fail2ban -y

# AlmaLinux/Rocky Linux/RHEL
sudo yum install fail2ban -y
Step 3. Enable and Start Fail2Ban
sudo systemctl enable fail2ban --now
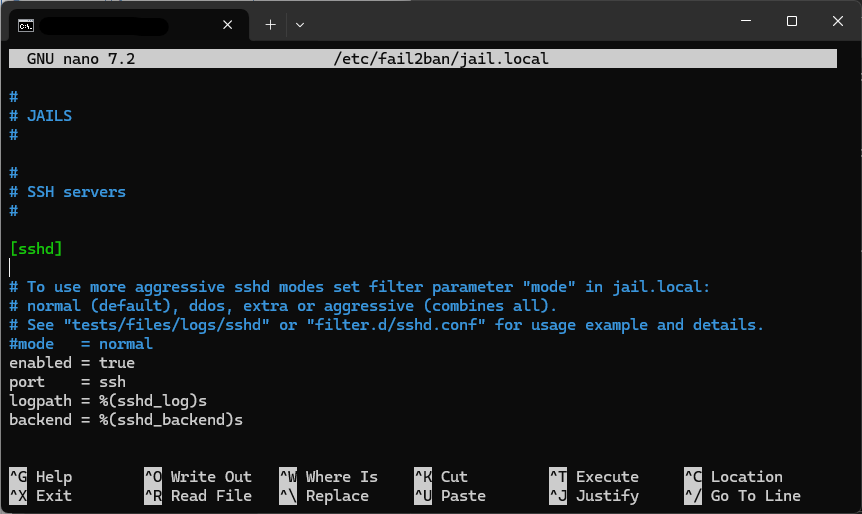
Step 4. Configure SSH Protection
We copy
/etc/fail2ban/jail.conf to
/etc/fail2ban/jail.local because updates may overwrite
jail.conf. By using
jail.local, your custom settings stay safe and won’t be lost during system upgrades.
sudo cp /etc/fail2ban/jail.conf /etc/fail2ban/jail.local
sudo sed -i '/^\[sshd\]/a enabled = true' /etc/fail2ban/jail.local
Optional: Permanent Ban Logic
If you prefer a stricter approach, you can set Fail2Ban to permanently ban IPs:
sudo nano /etc/fail2ban/jail.local
And edit:
bantime = -1
Once an IP is banned, it won’t be unbanned automatically. You’ll need to remove it manually if necessary:
sudo fail2ban-client set sshd unbanip YOUR_IP
If needed, you can also manually configure the
jail.local file to adjust settings like
bantime,
maxretry, or specific services you want to protect.
Step 5. Restart Fail2Ban
sudo systemctl restart fail2ban
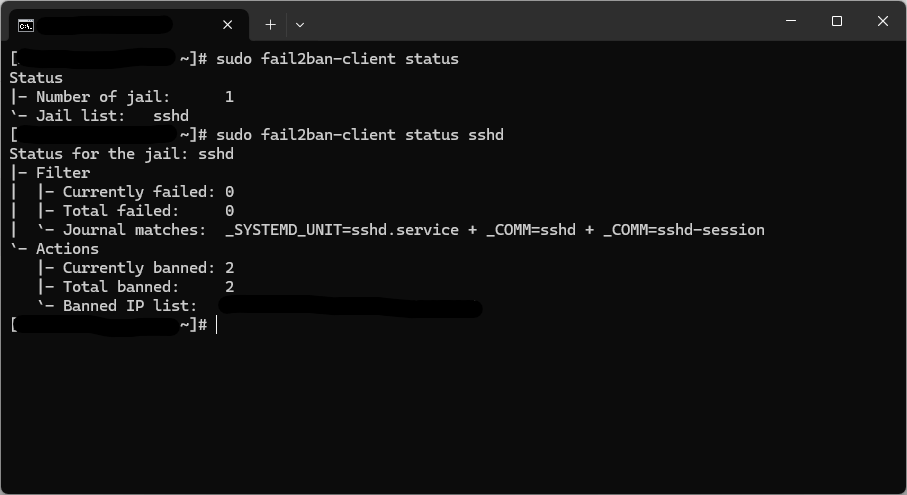
Step 6. Verify SSH Jail
sudo fail2ban-client status
sudo fail2ban-client status sshd
Step 7. Test Fail2Ban
Try logging in with the wrong password multiple times from another IP (VPN or different device). After 5 failed attempts, the IP should be banned.
Step 8. Manually Manage IPs
Unban an IP:
sudo fail2ban-client set sshd unbanip YOUR_IP
Ban an IP:
sudo fail2ban-client set sshd banip YOUR_IP
Optional: Monitor Logs
Monitor logs in real time:
sudo tail -f /var/log/fail2ban.log
Quick Commands
Ubuntu/Debian:
sudo apt update -y
sudo apt install fail2ban -y
sudo cp /etc/fail2ban/jail.conf /etc/fail2ban/jail.local
sudo systemctl enable fail2ban --now
sudo sed -i '/^\[sshd\]/a enabled = true' /etc/fail2ban/jail.local
sudo systemctl restart fail2ban
AlmaLinux/Rocky Linux/RHEL:
sudo yum update -y
sudo yum install epel-release -y
sudo yum install fail2ban -y
sudo cp /etc/fail2ban/jail.conf /etc/fail2ban/jail.local
sudo systemctl enable fail2ban --now
sudo sed -i '/^\[sshd\]/a enabled = true' /etc/fail2ban/jail.local
sudo systemctl restart fail2ban
Conclusion
Fail2Ban is a simple yet powerful tool to protect SSH from brute-force attacks. By installing and configuring it, you significantly improve your server’s security and reduce risks from malicious login attempts. Adding Fail2Ban ensures that your Evoxt VPS runs both securely and reliably. Looking for more Linux security tips? Check out our other
Evoxt VPS Guides.
Still having issues?
Open a support ticket with Evoxt for assistance.