Set up your very own personal password manager using Bitwarden (VaultWarden) with Evoxt with only a single click with our One-Click Installation Script for maximum security.
Bitwarden is a free and open-source password management service that stores sensitive information such as login credentials, payment information, and notes in an encrypted vault. Bitwarden is the most preferred solution for self-host enthusiasts and users who do not trust large corporations with their passwords.
With the recent LastPass master password leak scare, many users are switching to alternative self-hosted solutions because such focused, sophisticated password manager – LastPass managed to get their information compromised even when their focus is security. With Bitwarden, you are in control of your security. Human error will be minimized because you are the only one in control of your Bitwarden's security.
With this installation, you will be getting VaultWarden, the lightweight version, and the free and open-sourced version of Bitwarden, which allows you to host Bitwarden with Evoxt's lowest VM plan.
Instruction
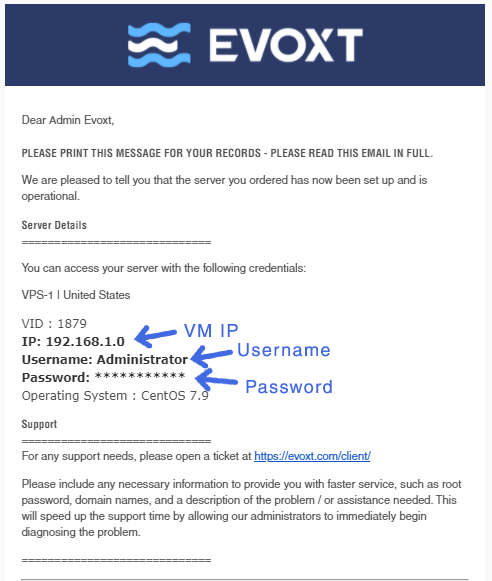
Check your email for your VM details. Your VM details are sent to your email inbox.
Check your junk/ spam mail just in case.
Did not receive it?
Contact us.
Setup
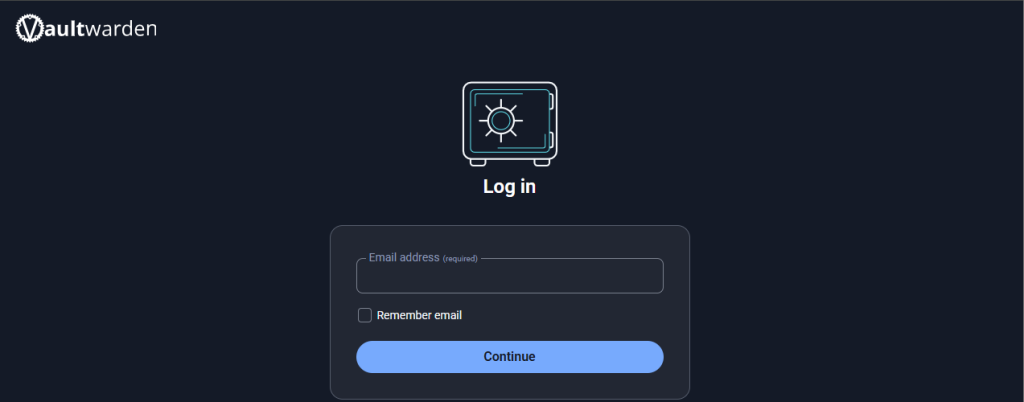
There is no installation required, Bitwarden server is up and running once the one-click installation has completed. To set up your Bitwarden, simply head to https://YOUR_VM_IP
https://192.168.0.1
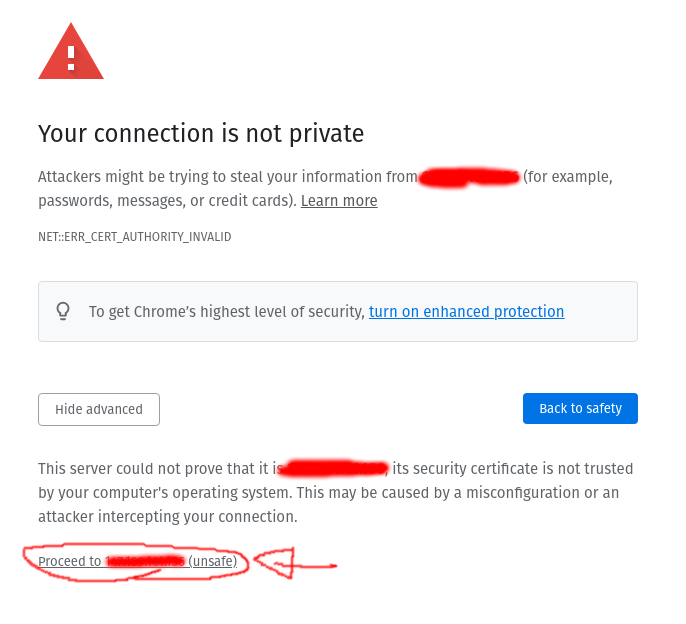
You will be greeted will an SSL insecure page. Click ignore warnings to bypass the page.
Click create an account to create an account.
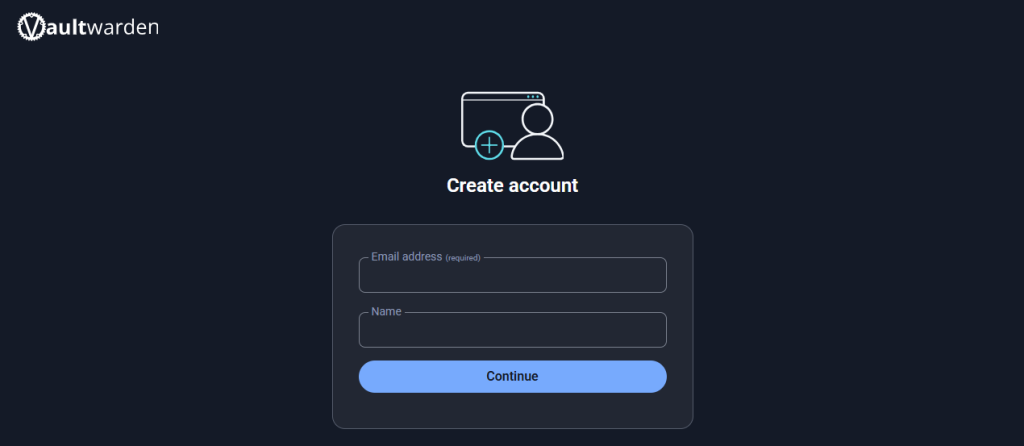
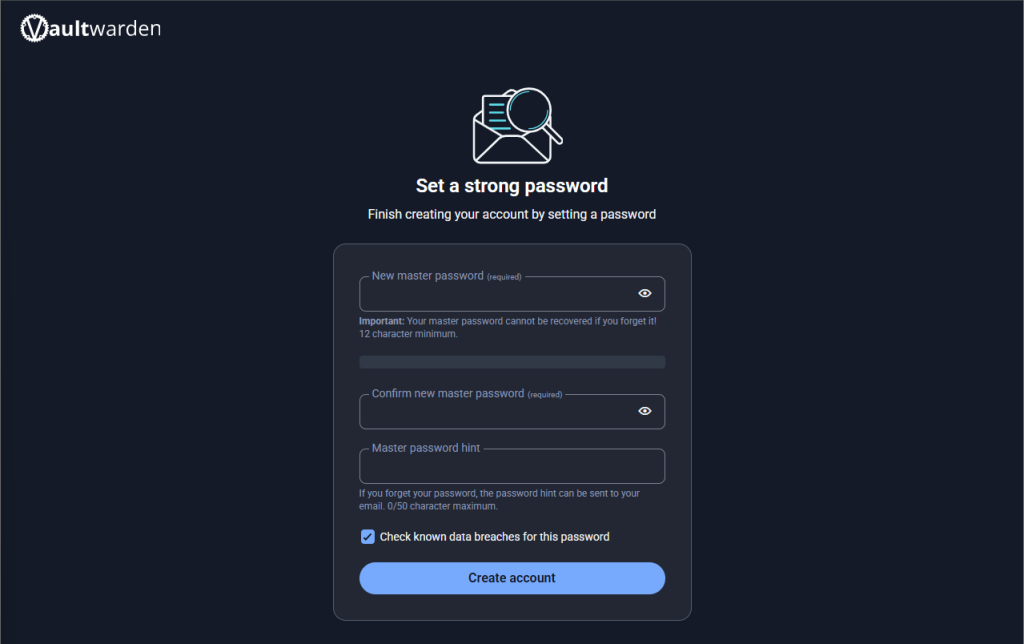
Fill in the details, and you are done.
You can now easily log in to your Bitwarden account and manage your passwords there.
Extras
Connect to your Bitwarden server
In this tutorial we will be using
Bitwarden's Google Chrome Extension, this should be similar on other platforms.
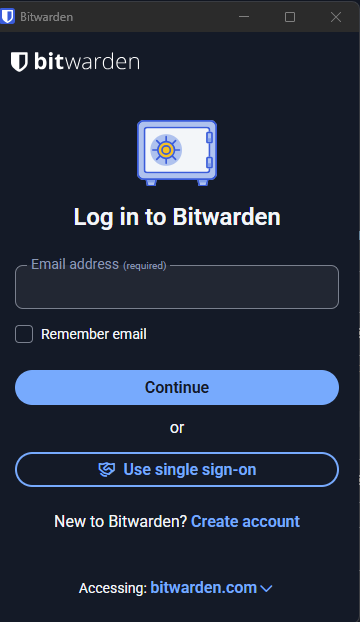
Because this is a self-hosted version, a server URL must be set before logging in. If this is not set, you will be connecting to Bitwarden's server instead of your self-hosted server.
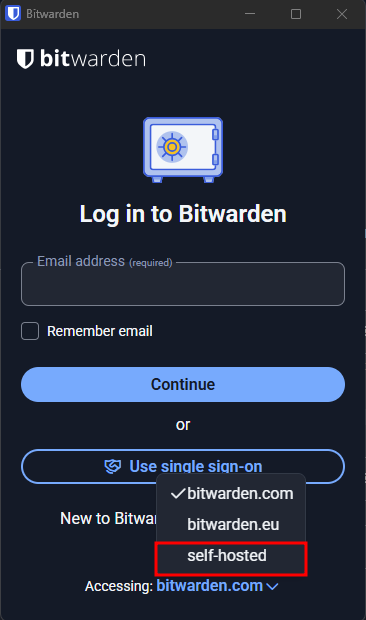
Click to
bitwarden.com and select
self-hosted.
Key in your server's IP address and click save.
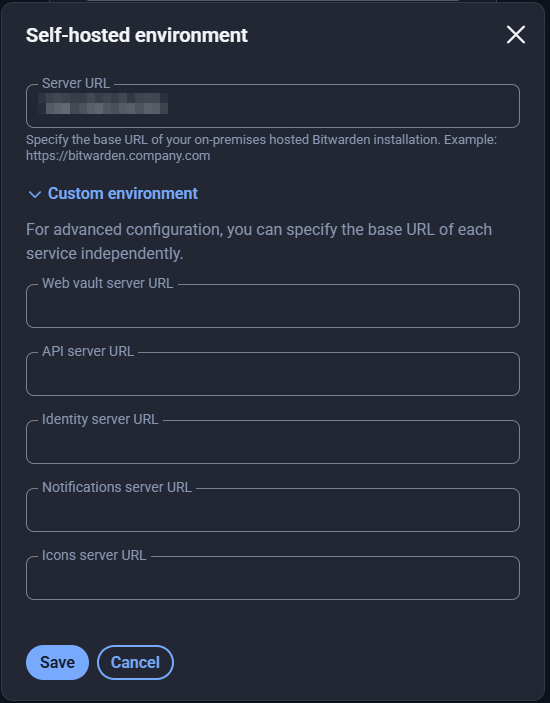
Note: To be secure, we prefer to set the server address as HTTPS (https://your_IP_address) instead of HTTP (http://your_IP_address). However, by setting to HTTPS, you might get an issue connecting to your server due to the usage of a self-signed certificate.
There are several methods to go with this:
1) Use the HTTP version (http://your_IP_address). Your connection to your server will be insecure. ( Not recommended )
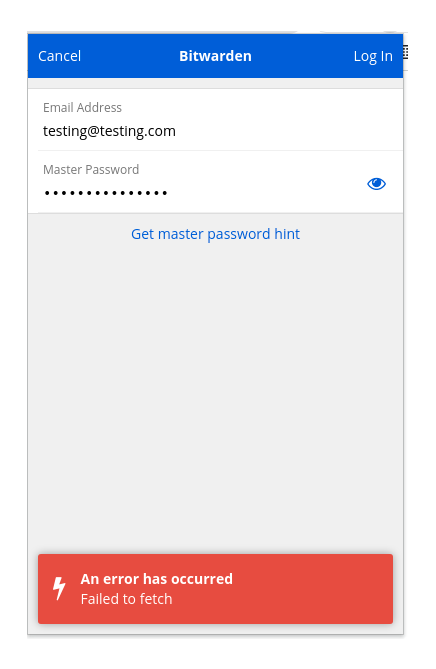
2) Use the HTTPS version (https://your_IP_address). Your connection to your server will be secure, if you get
Failed to Fetch error. You will have to go to https://your_IP_address on your chrome browser and click ignore to bypass the ERR_CERT_AUTHORITY_INVALID error message.
3) Set up a domain with SSL for your Bitwarden server and connect using yourdomain.com instead of your server IP address.
Cloudflare Method (Easiest):
Click here for guide
Configure CertBot :
Click here for guide
Secure your Bitwarden server
As this is a self-hosted solution, your server's security is under your control. You will be responsible for securing your server to prevent potential unauthorized access to your server.
1) Securing your SSH server
2) Limiting IP address that can connect to your Bitwarden server