Evoxt's IP Management tool provides you with more control of your servers and easier management of your servers. With the ability to reassign IP, remove IP, add extra floating IP and swap IPv4 addresses between servers. With these IP management tools, you can easily switch between development and live servers, minimize downtime with Evoxt's Floating IP address, and more!
Evoxt's IP Management tools mainly focus on IPv4 at this moment. This will be
Assign IPv4 Tools and
Swap IPv4 Tools
Accessing Assign IP tool
To access the Assign IP tool, go to the VM control panel.
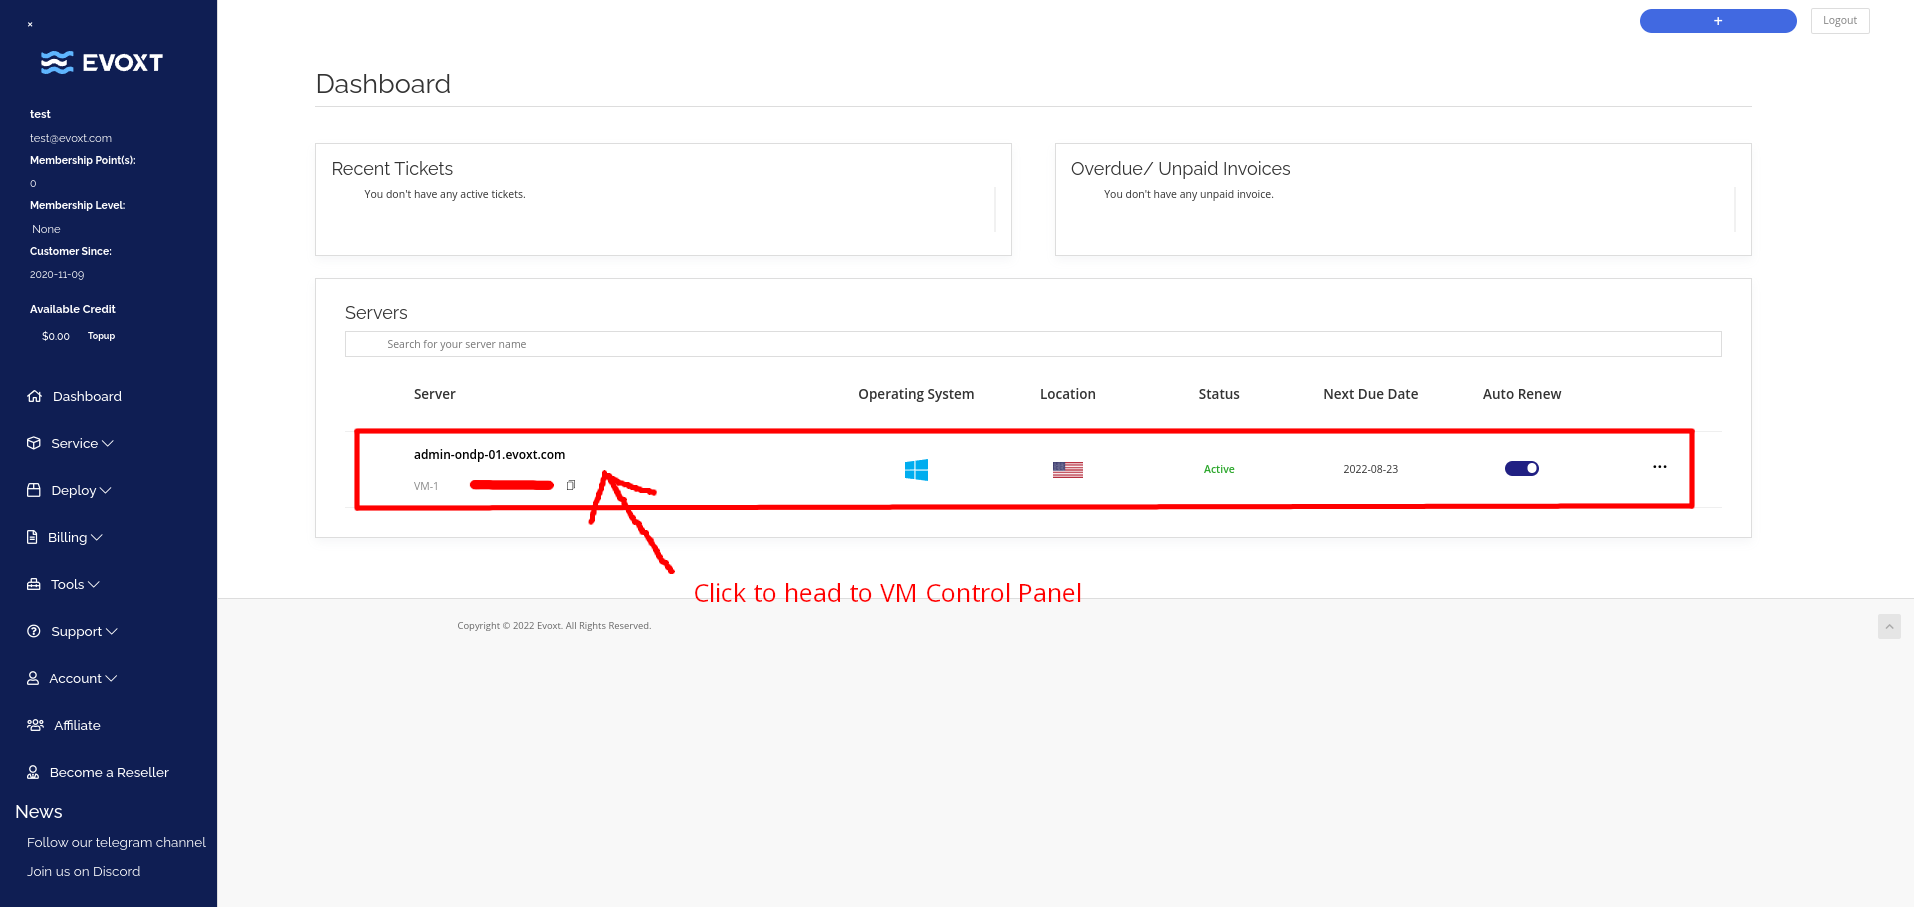
Then click on the IP Management on the top bar, as shown in the image below.
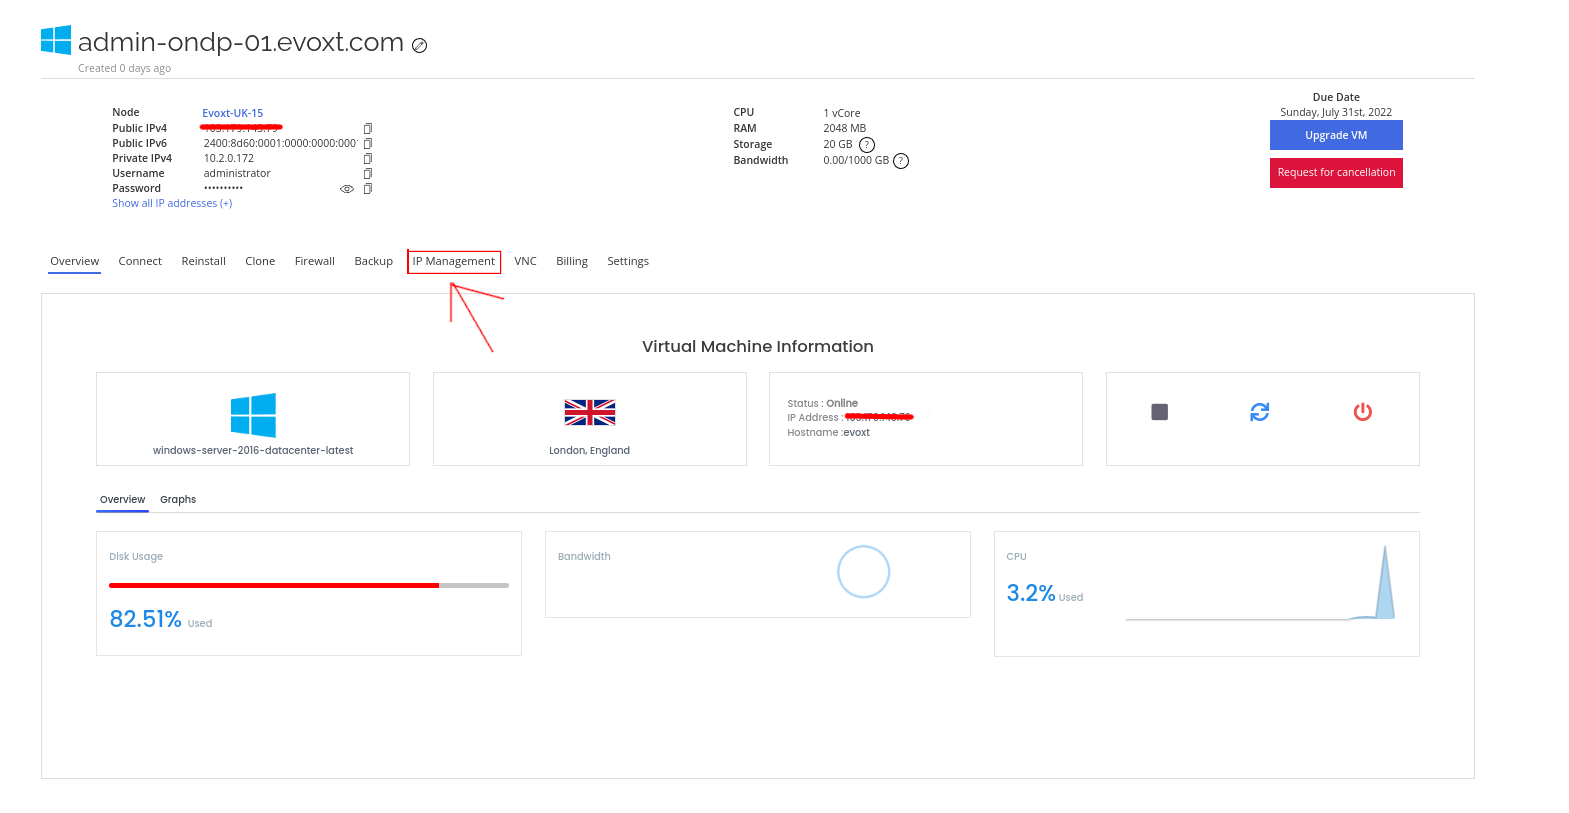
You are now at the Assign IP tool.
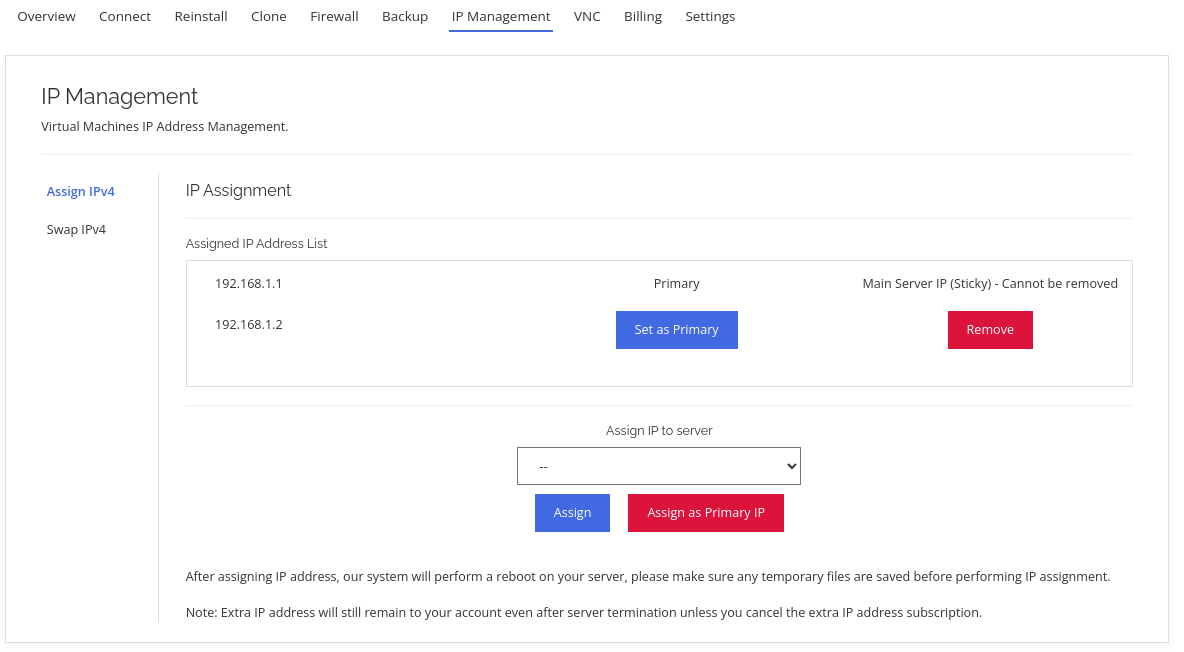
Assign IPv4 Guide
Here is a screenshot that helps you with understanding the Assign IPv4 tool. Each option and thing to note in the screenshot is labeled with numbers.
Please note that you can only assign IP from the same region, if you wish to move server to another region, please
open a support ticket.
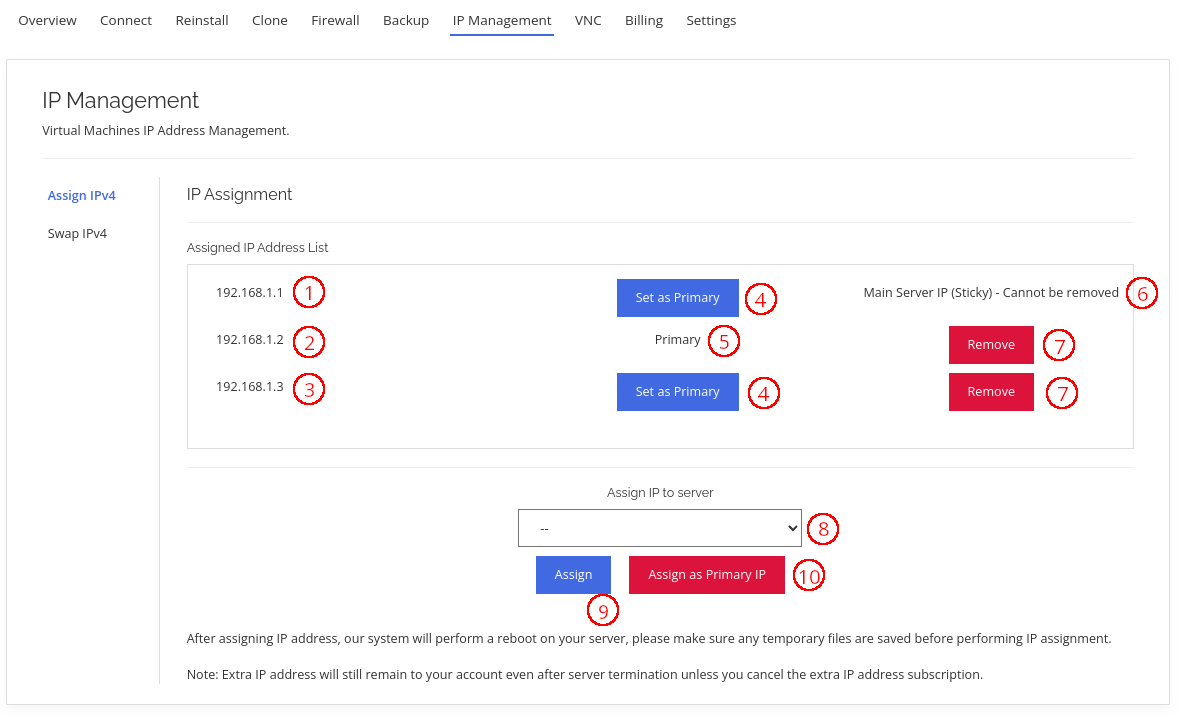
1, 2 & 3 – These are the currently assigned and active IP addresses in the server.
4s – Set as Primary button. Use this button to set the specific IP address as the primary IP address
5 – "Primary" indicates that this IP address is the primary IP address. All servers must have a primary IP address.
6 – "Main Server IP (Sticky)" indicates that this IP address is the IP address that comes with this server. Sticky IP cannot be removed. Please use the Swap IP feature if you need to move this to another server.
7s – Remove button. Use this button to remove the specific IP address from the server.
8 – This dropdown box list all the extra IP address that can be assigned to this server. Use this dropdown box to select an IP address and the assign button below to assign the IP address selected.
9 – Assign button. Use this button to assign the selected IP address on the dropdown box as one of the IP addresses.
10 – Assign as Primary IP button. Use this button to assign the selected IP on the dropdown box as the primary IP address of this server.
After performing any action, our system will perform a reboot on the server. Please make sure all temporary files that need to be kept are saved before performing any IP assignment action
Accessing Swap IP tool
To access the Assign IP tools, go to the VM control panel.
Then click on the IP Management on the top bar, as shown in the image below.
You are now on the Assign IP tool.
Then from the sidebar, click on Swap IPv4 to access the Swap IP tool.
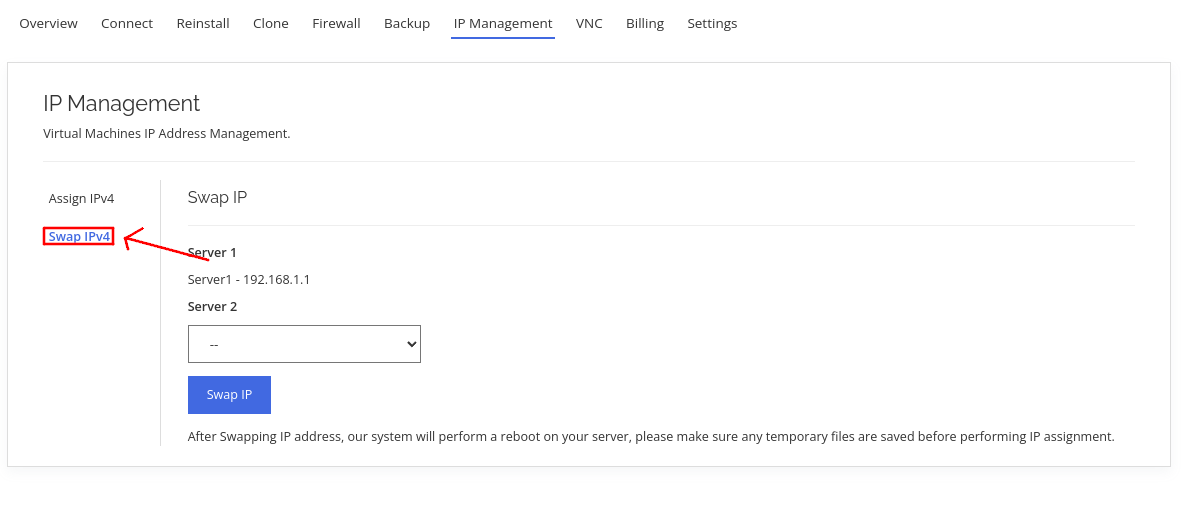
Swap IP Guide and More information
Swap IP tool will swap all the
public IPv4 from one server to another server.
To use this tool, select a server on the second dropdown box to swap with and click on the swap IP address to perform the swap.
Please note that you can only swap IP between servers from the same region. If you wish to move a server to another region, please
open a support ticket.
After performing IP swapping, our system will perform a reboot on the server. Please make sure all temporary files that need to be kept are saved before performing any IP swap