Set up your very own personal WireGuard server with Evoxt with only a single click with our One-Click Installation Script.
WireGuard is another popular virtual private network (VPN) protocol that offers secure and efficient network connections. Similar to OpenVPN, WireGuard encrypts network traffic, protects user privacy, and allows for bypassing restrictions on untrusted networks. In a business setting, WireGuard can be used to establish a secure connection between employees and the company's network, creating a private and encrypted communication channel. With WireGuard, users can also enjoy the benefits of anonymous browsing and secure data transmission while using public Wi-Fi networks.
The WireGuard installed with Evoxt's One-Click Installation will be
wg-easy made by Emile Nijssen due to its simplicity to configure profiles.
Instruction
Check your email for your VM details. Your VM details are sent to your email inbox.
Check your junk/ spam mail just in case.
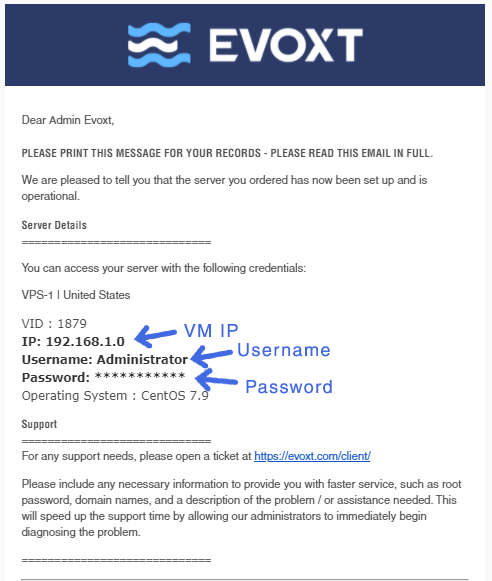
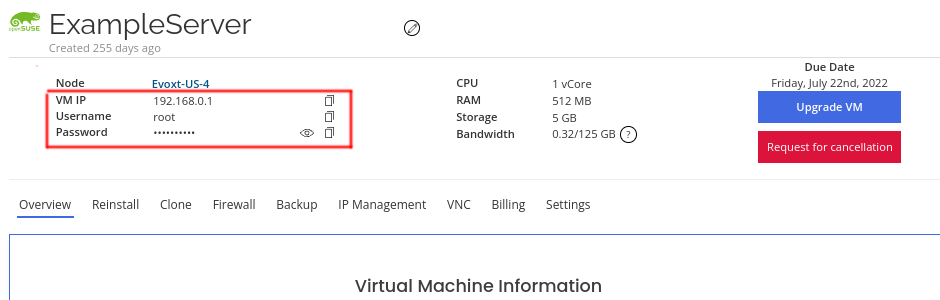
Alternatively, you can also get them by logging in to your Evoxt account and go to the respective VM control panel.
Did not see it in your account?
Contact us.
Installation
With Evoxt's One-click installation, your WireGuard server is already running and deployed.
To create your WireGuard connection profile, simply go to
http://<your_vm_ip>:51821
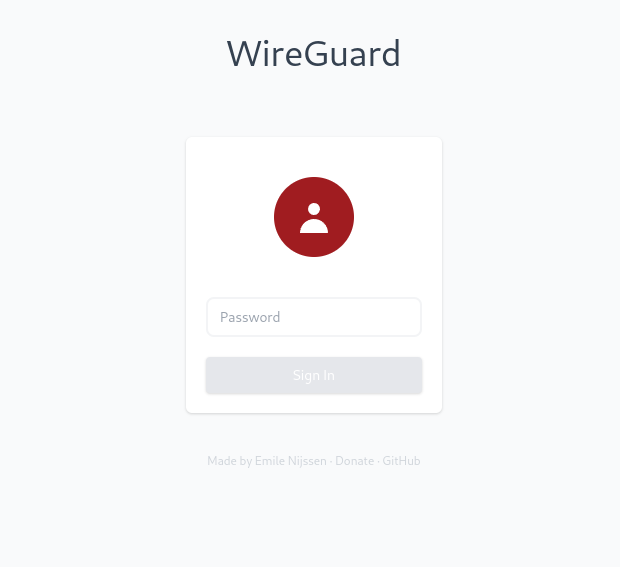
Can use this command to find your Wireguard password:
cat ~/wireguard-password.log
[root@TEST ~]# cat ~/wireguard-password.log
ZmM1MGU5ZWFmNzJlMmNkYm
[root@TEST ~]#
Configuration
Because this installation is using
wg-easy made by Emile Nijssen.
The configuration process is fairly simple, simply login and create clients
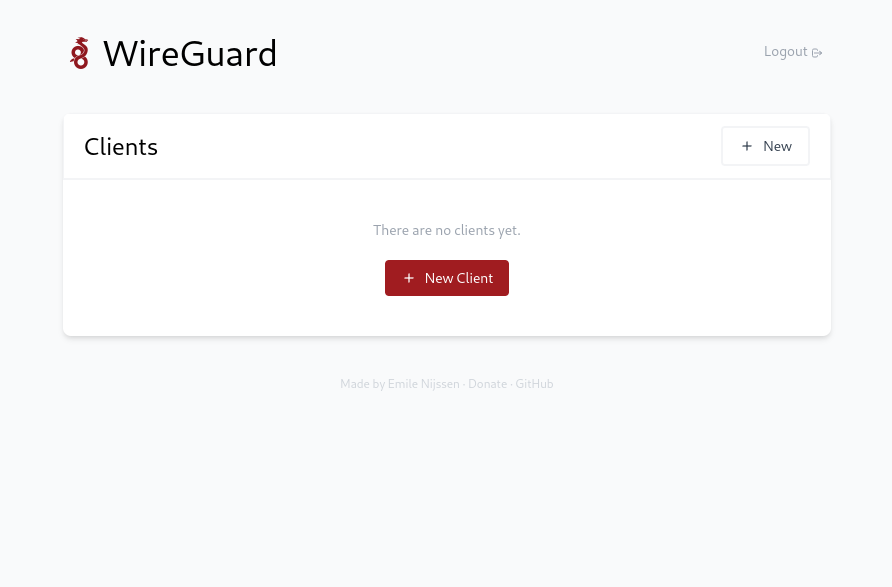
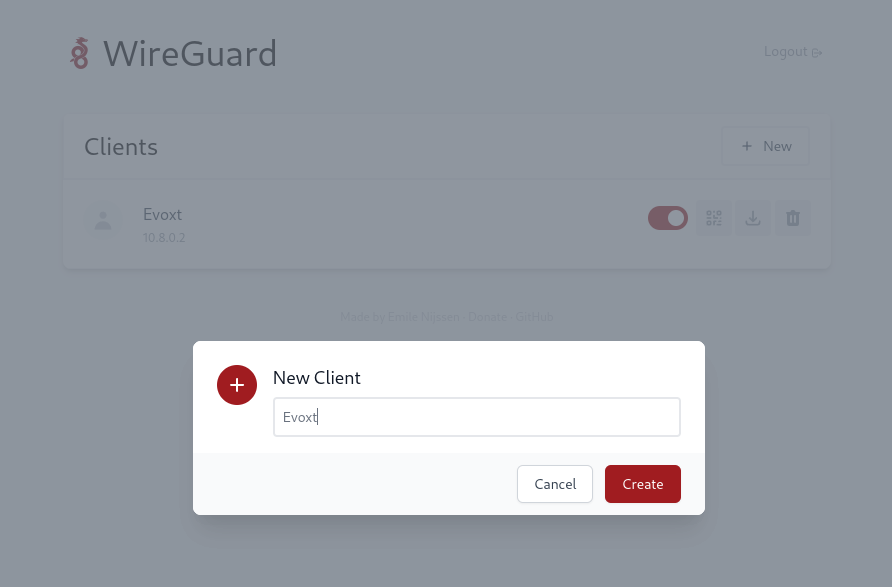
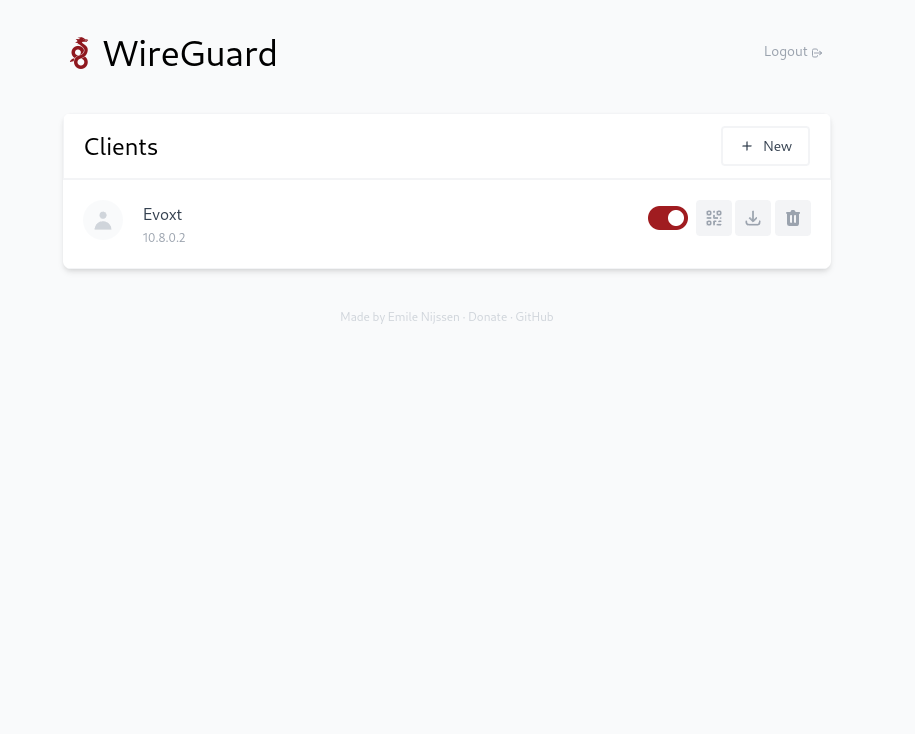
When new WireGuard profile is created, it will be located in your server's root directory ~/.wg-easy.
Upgrading your WireGuard server
To upgrade your WireGuard server to the latest version, simply execute these commands.
docker stop wg-easy
docker rm wg-easy
docker pull weejewel/wg-easydocker run -d \
–name=wg-easy \
-e WG_HOST=YOUR_SERVER_IP \
-e PASSWORD=YOUR_ADMIN_PASSWORD \
-v ~/.wg-easy:/etc/wireguard \
-p 51820:51820/udp \
-p 51821:51821/tcp \
–cap-add=NET_ADMIN \
–cap-add=SYS_MODULE \
–sysctl="net.ipv4.conf.all.src_valid_mark=1" \
–sysctl="net.ipv4.ip_forward=1" \
–restart unless-stopped \
weejewel/wg-easy
Deploy your own personal WireGuard server with just a single click! 

Your blog is a testament to your expertise and dedication to your craft. I'm constantly impressed by the depth of your knowledge and the clarity of your explanations. Keep up the amazing work!